There are two types of campaigns: default campaigns and custom campaigns. Default campaigns have basic rules built in, while custom campaigns can be created from scratch.
Each campaign sends just one template, one time. (For more on templates, see Create your Templates.)
All campaigns are inactive by default when you create your account so that you can customize them before starting to send emails.
By default, when you first activate a campaign, it will be sent for all orders that were placed up to 90 days ago and are still eligible to receive it. To reduce how far the campaign will "go back," add or edit the rule "Send only for orders created in the last [number] days."
How to Activate a Default Campaign
-
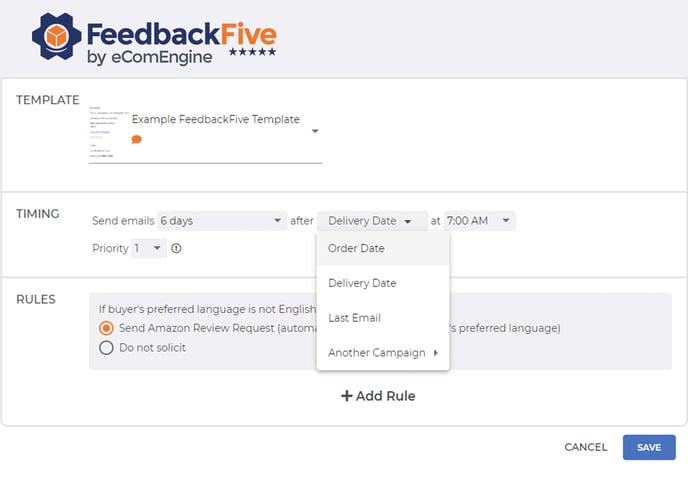
Select FeedbackFive in the top navigation and hover on the left side of the screen to open the navigation menu. Click Campaigns to open the campaign settings.
- Click the title of a campaign.
- Modify the timing options to suit your needs by clicking the drop-down menus in the Timing section.
- Add any other rules you'd like by clicking +Add Rule at the bottom of the page.
- NOTE: On some plan levels, default campaigns cannot be modified beyond the timing. On other plan levels, additional rules can be added. If you need additional rules and cannot add them, contact us for a plan review.
- Click “Save.”
- Return to the Campaigns page and toggle the “Inactive” switch to “Active.”
Note: Default campaigns can only be sent as the first email to an order. If the order has already received another email from FeedbackFive, the default campaign will not be sent. This is because Amazon only allows one request for feedback and/or a product review per order.
How to Create a Custom Campaign
-
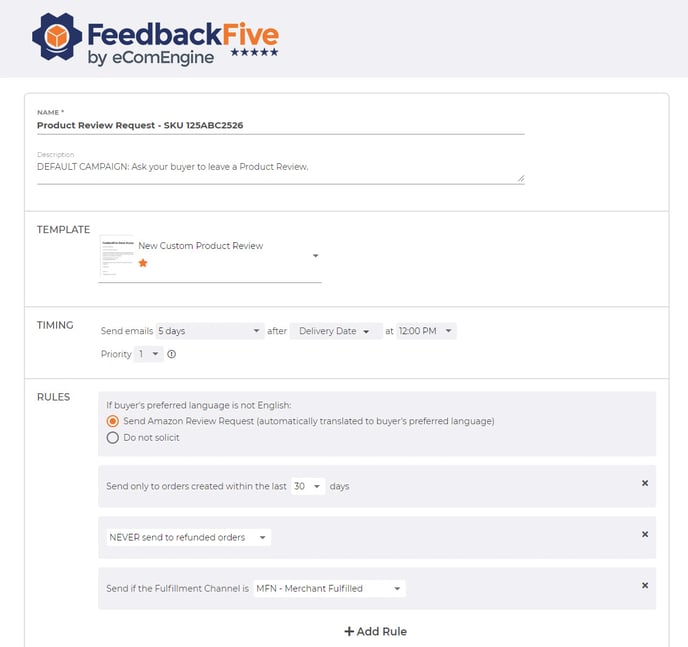
Select FeedbackFive in the top navigation and hover on the left side of the screen to open the navigation menu. Click Campaigns to open the campaign settings. Click +CREATE NEW CAMPAIGN. This will open a blank Campaign Rules page.
- Add a title (required) and description (optional). (Your buyers will not see these.)
- Attach a template in the Template section.
- Select timing options using the drop-down menus in the Timing section.
- Add additional rules as needed by clicking +ADD RULE at the bottom of the page.
To learn more about custom rules and timing options, see Use Custom Campaign Rules.
Notes:
- Some older plan levels do not include custom campaigns. You can always upgrade your plan on the Account page or contact us for more information about plan options.
- Campaigns that use the official Amazon Feedback and Review Request Template behave differently than other campaigns. Learn more here.