Part 1: Create an Account
- Click here and choose the plan level that best fits your FBA order volume.
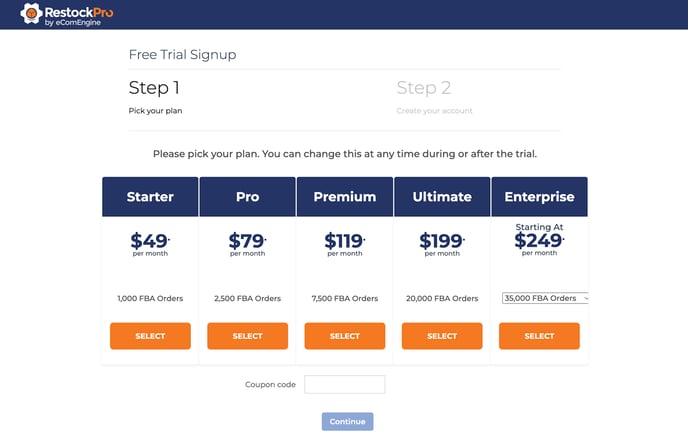
- If you have a coupon code, you can enter it either here or during Part 2.
- Click Continue.
- On the next page, enter:
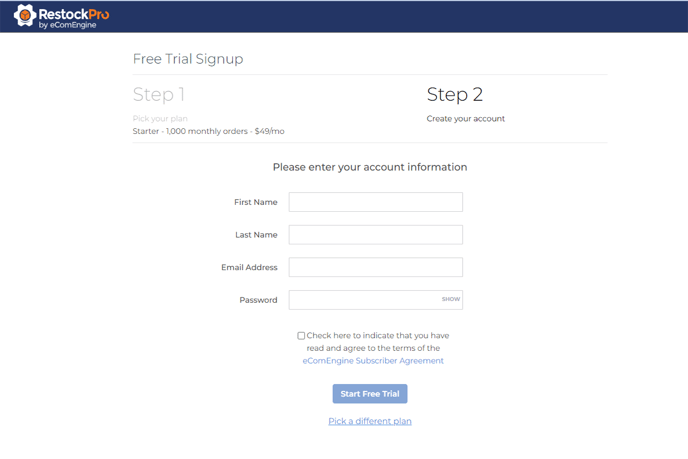
- Your first and last name.
- A valid email address that can receive important emails about your account.
- A secure password.
- Check the box to agree to the eComEngine Subscriber Agreement.
- Click Start Free Trial.
Part 2: Add Your Store
-
On the next page, provide the information about your Amazon store:
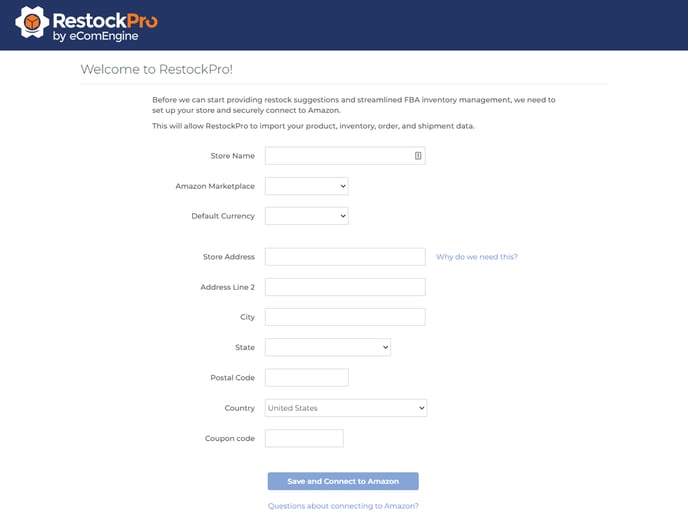
- Store Name: This should be the name of your store on Amazon.
- Amazon Marketplace: If you sell on multiple marketplaces, you can add more stores later.
- Default currency: This the currency in which your sales data and other information will be shown. You won't be able to change it later without contacting us, but you will be able to set different currencies for international suppliers later, if needed.
- Store Address, City, State, Postal Code: This is the address RestockPro will use as your default location for receiving purchase orders and creating shipments, but you'll be able to add other locations later if needed.
- Coupon code (optional): If you did not add a coupon code during part 1, you can add one now.
- Click Save and Connect to Amazon.
- A new window will open. Log into Seller Central as the primary administrator of your account and follow the prompts to allow RestockPro to connect.
To continue setting up your new account, see How do I set up RestockPro?